Architecture overview
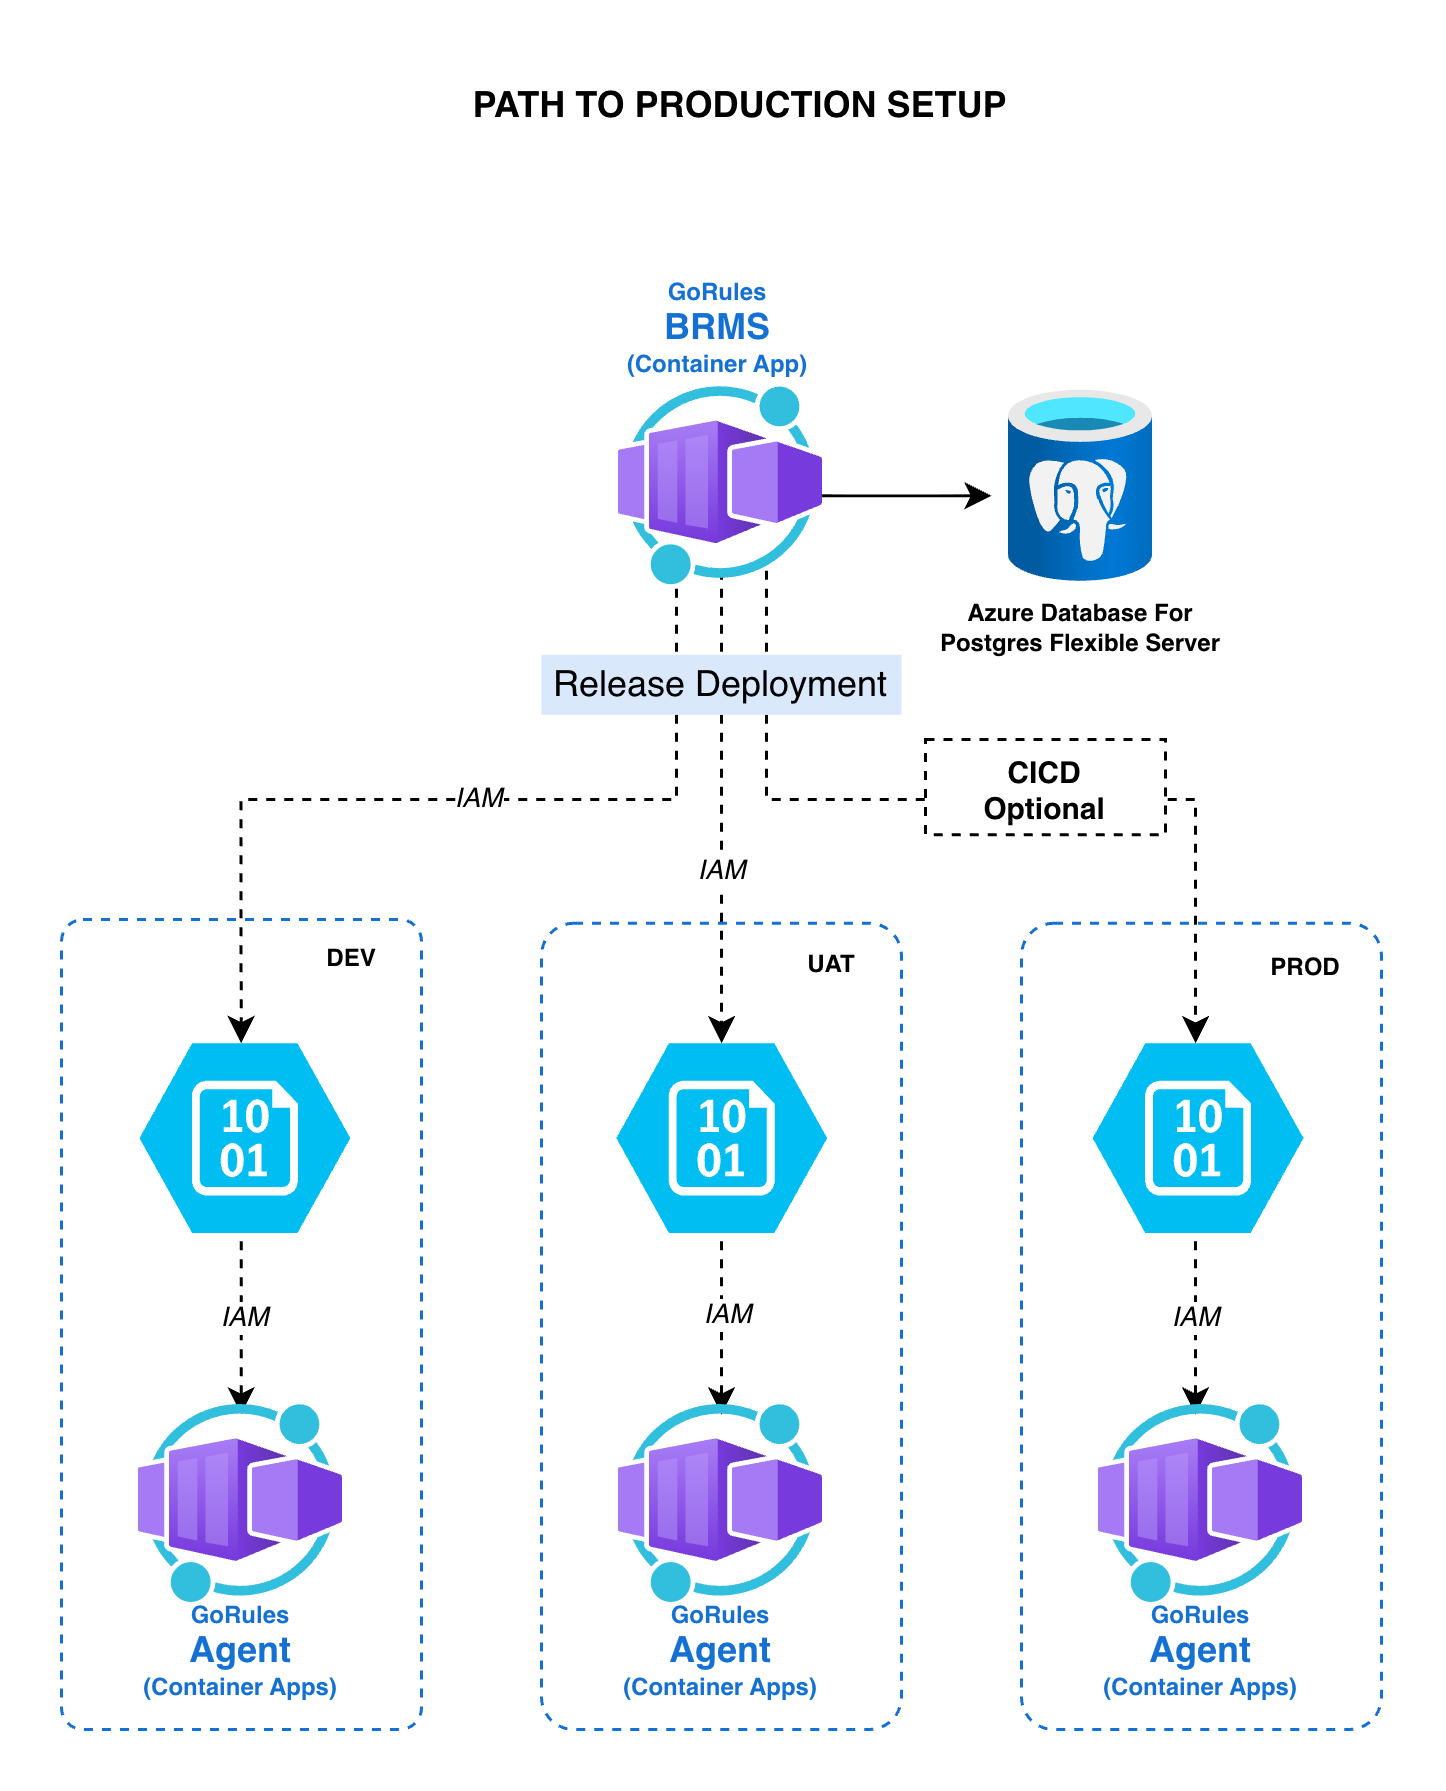
- GoRules BRMS — Containerized application
- Azure Container Apps — Serverless compute engine for containers
- Azure Database for PostgreSQL flexible servers — Managed PostgreSQL relational database
Terraform modules are coming soon.
Database — Setting up Azure Database for PostgreSQL
1. Initiate database creation
- Log in to the Azure Portal with your Microsoft account credentials
- Click Create a resource
- Search for “Azure Database for PostgreSQL Flexible Server”
- Click Create
2. Project details
- Select your Azure subscription
- Choose or create a new resource group
3. Server details
- Enter a unique name for your server in Server name
- Select the Azure region where you will host BRMS
- Select PostgreSQL version 16
- Select workload type (e.g., Production Small/Medium)
- Customize to 2 vCores and 8GB RAM if needed
- Enable high availability for production setups
4. Authentication
- Select PostgreSQL authentication only
- Set an admin username and password
- Important: Remember the USERNAME and PASSWORD
5. Networking tab
- Choose your connectivity method
- Set up firewall rules if needed
6. Security tab
- Select Service-managed key
7. Review and create
- Review your settings
- Click Create to deploy your PostgreSQL server
8. Create database and get configuration
- After deployment, go to your resource list
- Open the newly created server
- Go to Overview and copy the Server Name on the right side
- Important: Remember the SERVER NAME / HOST
- From the side menu, select Databases and click Add
- Enter a name (e.g.,
gorules-dev) and click Save - Important: Remember the DATABASE name
- From the side menu, select Networking and download the SSL Certificate
- Use the GoRules Base64 Certificate tool to convert the certificate to base64
Never commit sensitive information like database passwords to version control. Always use environment variables or a secure secrets management solution.
Container runner — Setting up Container Apps
1. Create Container Apps
- Click Create a resource
- Search for “Container Apps”
- Select and click Create
2. Basics tab
- Choose your subscription
- Choose or create a resource group
- Enter a container app name
- Set deployment source to Container image
3. Container Apps environment
- Select region (same as database)
- For a simple setup, leave the managed environment
- For complex setups, configure your environment manually
4. Container tab and finalization
- Select Use quickstart image (we will configure the proper image later)
- Skip bindings and tags
- Go to Review and Create
- Review your settings and click Create to deploy your container app
5. Configuring Container Apps
Once deployed, open the newly created Container App:- From the left menu, go to Overview and copy the URL
- Important: Remember the URL
- Open the Containers menu and click Edit and Deploy
- In the Container tab, Container Images section, select the image and click Edit
Properties tab
For production, use a specific image version instead of
latest.Environment variables tab
Health probes tab
Enable all 3 probes (Liveness, Readiness, Startup) with these values:- Click Save and close the side drawer
Scale tab
- Set min replicas: 1 (or 2 for production)
- Set max replicas: 2 (or higher for production)
- Click Create
6. Finalize
- Monitor status in the Revisions and Replicas menu
- Upon successful deployment, open the Application URL link in the Overview menu