> ## Documentation Index
> Fetch the complete documentation index at: https://docs.gorules.io/llms.txt
> Use this file to discover all available pages before exploring further.
# Azure Container Apps
> Deploy GoRules BRMS on Azure Container Apps with PostgreSQL flexible servers.
Deploy GoRules BRMS on Azure Container Apps for a serverless container experience. This guide covers a scalable, cost-effective, and easily maintainable infrastructure.
## Architecture overview
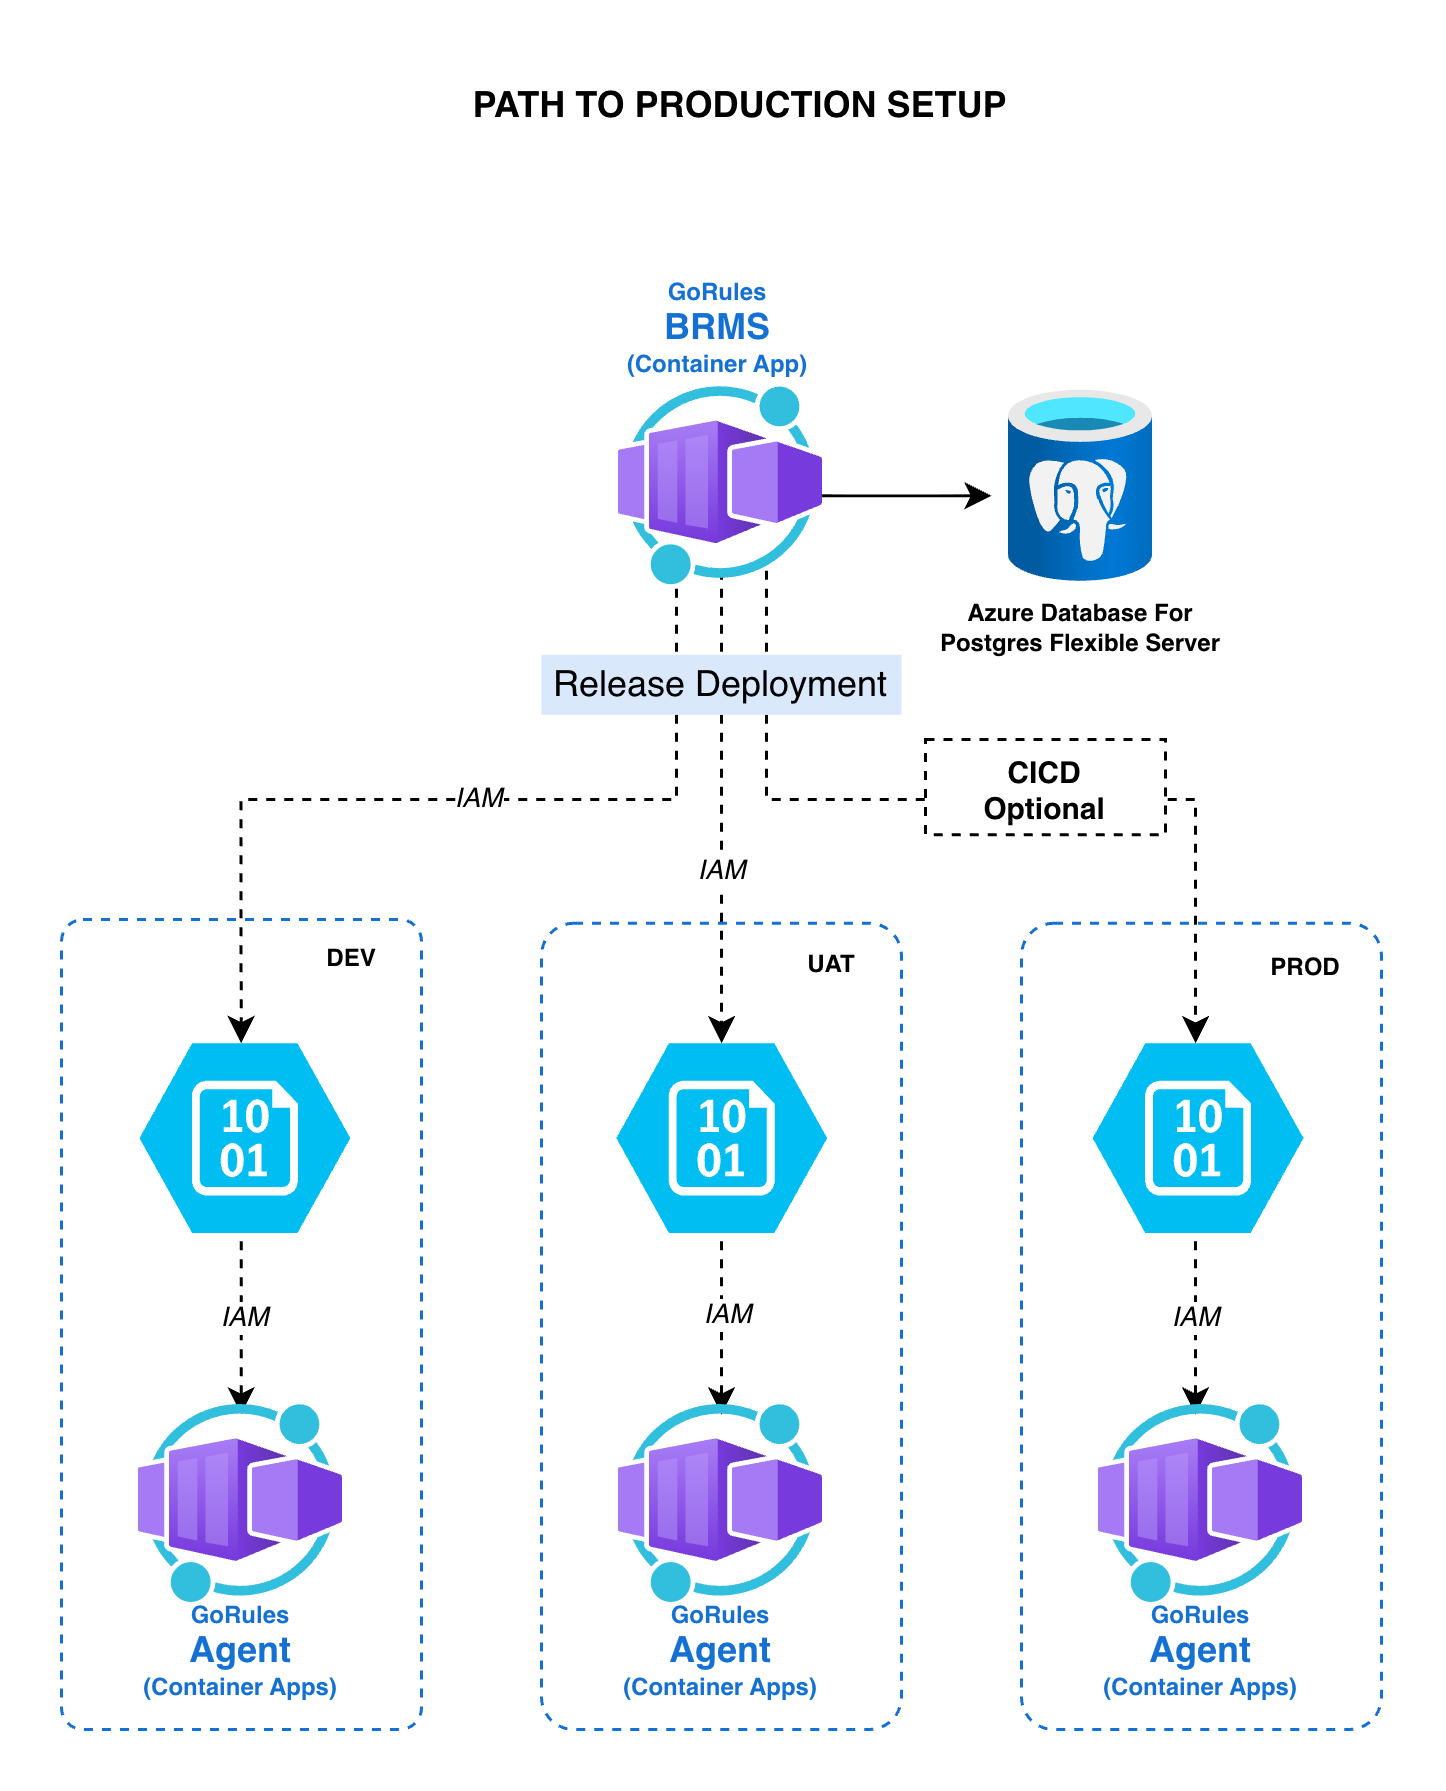 **Components:**
* **GoRules BRMS** — Containerized application
* **Azure Container Apps** — Serverless compute engine for containers
* **Azure Database for PostgreSQL flexible servers** — Managed PostgreSQL relational database
Terraform modules are coming soon.
## Database — Setting up Azure Database for PostgreSQL
### 1. Initiate database creation
1. Log in to the [Azure Portal](https://portal.azure.com) with your Microsoft account credentials
2. Click **Create a resource**
3. Search for "Azure Database for PostgreSQL Flexible Server"
4. Click **Create**
### 2. Project details
1. Select your Azure subscription
2. Choose or create a new resource group
### 3. Server details
1. Enter a unique name for your server in **Server name**
2. Select the Azure region where you will host BRMS
3. Select PostgreSQL version 16
4. Select workload type (e.g., Production Small/Medium)
5. Customize to 2 vCores and 8GB RAM if needed
6. Enable high availability for production setups
### 4. Authentication
1. Select **PostgreSQL authentication only**
2. Set an admin username and password
3. **Important:** Remember the USERNAME and PASSWORD
### 5. Networking tab
1. Choose your connectivity method
2. Set up firewall rules if needed
Your database should not be publicly accessible in production environments.
### 6. Security tab
1. Select **Service-managed key**
### 7. Review and create
1. Review your settings
2. Click **Create** to deploy your PostgreSQL server
### 8. Create database and get configuration
1. After deployment, go to your resource list
2. Open the newly created server
3. Go to **Overview** and copy the **Server Name** on the right side
4. **Important:** Remember the SERVER NAME / HOST
5. From the side menu, select **Databases** and click **Add**
6. Enter a name (e.g., `gorules-dev`) and click **Save**
7. **Important:** Remember the DATABASE name
8. From the side menu, select **Networking** and download the SSL Certificate
9. Use the [GoRules Base64 Certificate tool](https://gorules.io/tools/base64-certificate) to convert the certificate to base64
Never commit sensitive information like database passwords to version control. Always use environment variables or a secure secrets management solution.
## Container runner — Setting up Container Apps
### 1. Create Container Apps
1. Click **Create a resource**
2. Search for "Container Apps"
3. Select and click **Create**
### 2. Basics tab
1. Choose your subscription
2. Choose or create a resource group
3. Enter a container app name
4. Set deployment source to **Container image**
### 3. Container Apps environment
1. Select region (same as database)
2. For a simple setup, leave the managed environment
3. For complex setups, configure your environment manually
### 4. Container tab and finalization
1. Select **Use quickstart image** (we will configure the proper image later)
2. Skip bindings and tags
3. Go to **Review and Create**
4. Review your settings and click **Create** to deploy your container app
### 5. Configuring Container Apps
Once deployed, open the newly created Container App:
1. From the left menu, go to **Overview** and copy the URL
2. **Important:** Remember the URL
3. Open the **Containers** menu and click **Edit and Deploy**
4. In the **Container** tab, Container Images section, select the image and click **Edit**
#### Properties tab
| Field | Value |
| -------------- | ------------------------------ |
| Name | Your container app name |
| Image source | Docker Hub or other registries |
| Image type | Public |
| Registry login | docker.io |
| Image and tag | gorules/brms:latest |
| CPU cores | 1 |
| Memory | 2Gi |
For production, use a specific image version instead of `latest`.
#### Environment variables tab
| Variable | Description |
| ------------------------ | --------------------------------------------------- |
| DB\_HOST | Server name from step 8.4 |
| DB\_USER | Admin username from step 4.2 |
| DB\_PASSWORD | Admin password (should come from vault) |
| DB\_NAME | Database name from step 8.6 |
| DB\_REJECT\_UNAUTHORIZED | `true` |
| DB\_SSL\_CA | Base64 encoded certificate from step 8.9 |
| LICENSE\_KEY | From [portal.gorules.io](https://portal.gorules.io) |
| APP\_NAME | Your app name (e.g., "Company DEV") |
| APP\_URL | URL from step 5.2 |
| COOKIE\_SECRET | Secure secret (should come from vault) |
#### Health probes tab
Enable all 3 probes (Liveness, Readiness, Startup) with these values:
| Setting | Value |
| -------------- | ----------- |
| Path | /api/health |
| Initial delay | 5 |
| Other settings | Default |
1. Click **Save** and close the side drawer
#### Scale tab
1. Set min replicas: 1 (or 2 for production)
2. Set max replicas: 2 (or higher for production)
3. Click **Create**
### 6. Finalize
1. Monitor status in the **Revisions and Replicas** menu
2. Upon successful deployment, open the **Application URL** link in the Overview menu
**Components:**
* **GoRules BRMS** — Containerized application
* **Azure Container Apps** — Serverless compute engine for containers
* **Azure Database for PostgreSQL flexible servers** — Managed PostgreSQL relational database
Terraform modules are coming soon.
## Database — Setting up Azure Database for PostgreSQL
### 1. Initiate database creation
1. Log in to the [Azure Portal](https://portal.azure.com) with your Microsoft account credentials
2. Click **Create a resource**
3. Search for "Azure Database for PostgreSQL Flexible Server"
4. Click **Create**
### 2. Project details
1. Select your Azure subscription
2. Choose or create a new resource group
### 3. Server details
1. Enter a unique name for your server in **Server name**
2. Select the Azure region where you will host BRMS
3. Select PostgreSQL version 16
4. Select workload type (e.g., Production Small/Medium)
5. Customize to 2 vCores and 8GB RAM if needed
6. Enable high availability for production setups
### 4. Authentication
1. Select **PostgreSQL authentication only**
2. Set an admin username and password
3. **Important:** Remember the USERNAME and PASSWORD
### 5. Networking tab
1. Choose your connectivity method
2. Set up firewall rules if needed
Your database should not be publicly accessible in production environments.
### 6. Security tab
1. Select **Service-managed key**
### 7. Review and create
1. Review your settings
2. Click **Create** to deploy your PostgreSQL server
### 8. Create database and get configuration
1. After deployment, go to your resource list
2. Open the newly created server
3. Go to **Overview** and copy the **Server Name** on the right side
4. **Important:** Remember the SERVER NAME / HOST
5. From the side menu, select **Databases** and click **Add**
6. Enter a name (e.g., `gorules-dev`) and click **Save**
7. **Important:** Remember the DATABASE name
8. From the side menu, select **Networking** and download the SSL Certificate
9. Use the [GoRules Base64 Certificate tool](https://gorules.io/tools/base64-certificate) to convert the certificate to base64
Never commit sensitive information like database passwords to version control. Always use environment variables or a secure secrets management solution.
## Container runner — Setting up Container Apps
### 1. Create Container Apps
1. Click **Create a resource**
2. Search for "Container Apps"
3. Select and click **Create**
### 2. Basics tab
1. Choose your subscription
2. Choose or create a resource group
3. Enter a container app name
4. Set deployment source to **Container image**
### 3. Container Apps environment
1. Select region (same as database)
2. For a simple setup, leave the managed environment
3. For complex setups, configure your environment manually
### 4. Container tab and finalization
1. Select **Use quickstart image** (we will configure the proper image later)
2. Skip bindings and tags
3. Go to **Review and Create**
4. Review your settings and click **Create** to deploy your container app
### 5. Configuring Container Apps
Once deployed, open the newly created Container App:
1. From the left menu, go to **Overview** and copy the URL
2. **Important:** Remember the URL
3. Open the **Containers** menu and click **Edit and Deploy**
4. In the **Container** tab, Container Images section, select the image and click **Edit**
#### Properties tab
| Field | Value |
| -------------- | ------------------------------ |
| Name | Your container app name |
| Image source | Docker Hub or other registries |
| Image type | Public |
| Registry login | docker.io |
| Image and tag | gorules/brms:latest |
| CPU cores | 1 |
| Memory | 2Gi |
For production, use a specific image version instead of `latest`.
#### Environment variables tab
| Variable | Description |
| ------------------------ | --------------------------------------------------- |
| DB\_HOST | Server name from step 8.4 |
| DB\_USER | Admin username from step 4.2 |
| DB\_PASSWORD | Admin password (should come from vault) |
| DB\_NAME | Database name from step 8.6 |
| DB\_REJECT\_UNAUTHORIZED | `true` |
| DB\_SSL\_CA | Base64 encoded certificate from step 8.9 |
| LICENSE\_KEY | From [portal.gorules.io](https://portal.gorules.io) |
| APP\_NAME | Your app name (e.g., "Company DEV") |
| APP\_URL | URL from step 5.2 |
| COOKIE\_SECRET | Secure secret (should come from vault) |
#### Health probes tab
Enable all 3 probes (Liveness, Readiness, Startup) with these values:
| Setting | Value |
| -------------- | ----------- |
| Path | /api/health |
| Initial delay | 5 |
| Other settings | Default |
1. Click **Save** and close the side drawer
#### Scale tab
1. Set min replicas: 1 (or 2 for production)
2. Set max replicas: 2 (or higher for production)
3. Click **Create**
### 6. Finalize
1. Monitor status in the **Revisions and Replicas** menu
2. Upon successful deployment, open the **Application URL** link in the Overview menu